Stabilizer (Sway) Bar Removal — 4WD
How to remove and reinstall the front stabilizer bar on a 4WD Mitsubishi Delica / L300 Star Wagon, converted from the factory service manual.
- Manual section
- Group 33 — Front Suspension
- Manual pages
- 33-34 to 33-35 (4WD)
- Applies to
- L300 / Delica Star Wagon, 4WD
Tools needed
Standard sockets/spanners
no special tools required for this job
Why this job comes up on its own
Disconnecting the sway bar is also the key clearance step for front ball joint replacement — the lower control arm can’t travel far enough with the bar still connected. If you’re here because a ball joint guide sent you, you only need steps 1–4 below (disconnect, don’t fully remove).
Torque
| Fastener | Nm | ft·lbs |
|---|---|---|
| Stabilizer attaching bolt to hanger | 9–14 | 7–10 |
Removal steps
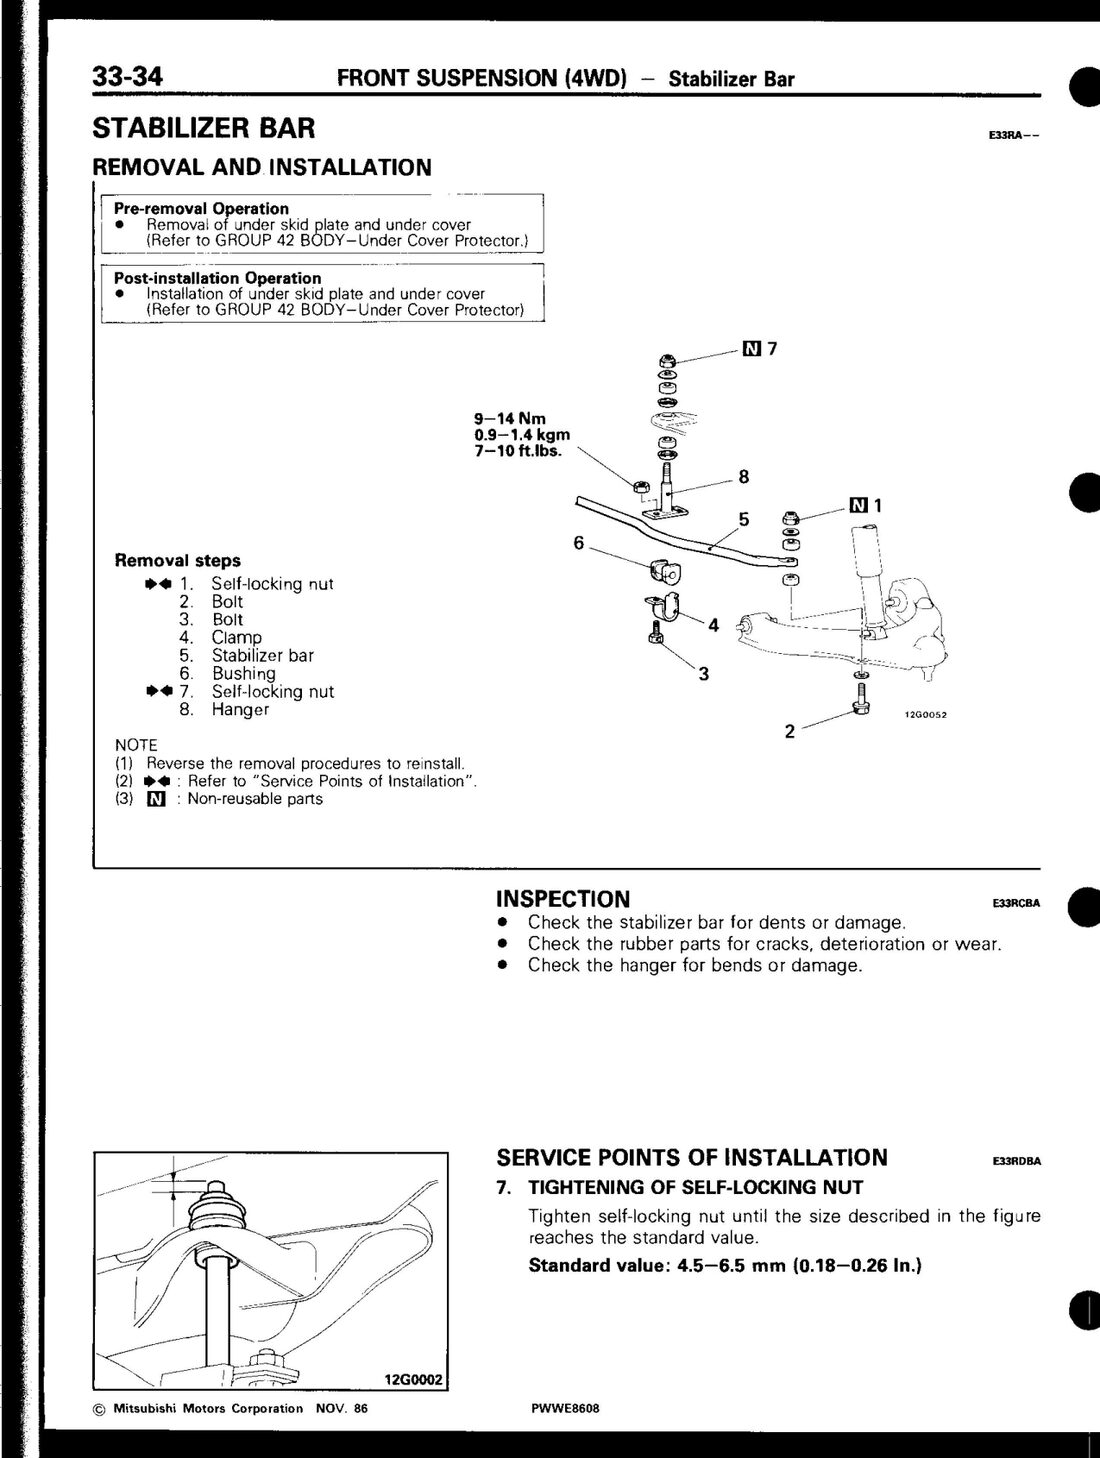 Factory service manual (PWWE8608), page 33-34.
- Remove the under skid plate and under cover.
- Remove the self-locking nut (non-reusable — fit a new one on reinstall).
- Remove the bolt.
- Remove the second bolt.
- Remove the clamp.
- Remove the stabilizer bar.
- Remove the bushing.
- Remove the second self-locking nut and the hanger.
Reinstall
Reverse the steps. Torque the attaching bolts to 9–14 Nm. When tightening the self-locking nut that secures the bar’s mounting cup, tighten until the exposed bolt thread reaches 8–10 mm — that’s the factory reference for correct preload, not a torque figure.
Inspection
- Check the stabilizer bar for dents or damage.
- Check the rubber bushings for cracks, deterioration, or wear.
- Check the hanger brackets for bends or damage.
Converted from the Mitsubishi factory service manual (document PWWE8608), Group 33 — Front Suspension, 4WD section, printed pages 33-34 to 33-35.
Last updated 2026-09-23.